A seamless end-of-tenancy process helps get your rental property ready for new tenants quickly – minimising stress, avoiding disputes, and reducing expensive downtime.
Without a clear process, those final days of a tenancy can easily become stressful, with tension running high on both sides. If you don’t yet have a clear system in place for getting your property cleaned up and restored to its original condition, we’re here to show you how.
The first step is understanding who is responsible for what. Both landlords and tenants have obligations when a tenancy comes to an end. Setting clear expectations from the start will help avoid confusion and prevent conflict, allowing everyone to part ways on good terms.
In this article, we’ll explain everything you need to know to take the hassle out of saying goodbye to one tenant and preparing for the next.
Landlord or tenant – who is responsible for what?
When a tenancy ends, both the landlord and tenant are often focused on their next steps and eager to move things along. During this transition period, confusion, unexpected delays, and last-minute costs can quickly lead to frustration – and, in some cases, conflict.
Set clear expectations from the get-go
To avoid conflict or bad feelings at the end of a tenancy, both the landlord and the tenant must be clear about exactly what is expected of them. Expectations surrounding cleanliness, damage, returning keys, inventory checks, and deposits should be clearly documented in the tenancy agreement. These clauses should be highlighted and explained to tenants during the onboarding process and then reiterated when they give their notice.
Tenant end-of-tenancy obligations
Tenants should aim to leave the property in the same condition that it was in at the start of the tenancy, aside from any fair wear and tear. Typically, this will require them to do the following:
- Thoroughly clean the property.
- Remove all personal belongings.
- Dispose of any rubbish.
- Return any borrowed items.
- Report any maintenance issues.
Landlord end-of-tenancy obligations
The landlord should deal with administrative tasks and arrange for any necessary repairs and maintenance. This typically includes the following:
- Inspecting the property’s condition.
- Carrying out an end-of-tenancy inventory check.
- Returning the tenant’s deposit promptly.
- Ensuring any deductions from the deposit are reasonable and supported by evidence.
- Arranging any necessary maintenance and repairs not caused by tenant damage.
- Preparing the property for new tenants.
Can tenants be required to pay for the property to be professionally cleaned?
In short, no. Since the Tenant Fees Act 2019 was introduced, landlords cannot require tenants to pay for a professional cleaning service or include a cleaning charge in the contract.
However, if the landlord had the property cleaned professionally before the tenant moved in and has evidence of this, then they may be able to request that the property be restored to this standard – but they can’t insist that the tenant pay for a professional service.
Carrying out an inventory check
Conducting an end-of-tenancy inventory check involves carrying out a thorough inspection of the rental property. The inventory check is a powerful end-of-tenancy tool for landlords. If you documented everything thoroughly at the start of the tenancy, this check provides a clear and fair comparison of the property’s condition at the start and end of the tenancy.
During an inventory check, landlords should work methodically from room to room, inspecting the overall condition of the rental property’s fixtures, fittings, and furnishings to assess for damage, wear, and cleanliness. The original check-in inventory, including descriptions and photographs, should be used as a benchmark to make a like-for-like comparison. The more detailed your original report is, the easier it will be to spot and provide evidence of any changes.
Some potential issues to look out for during an inventory check include the following:
- Damage to walls, floors, furniture, or appliances.
- Missing items or furnishings.
- Unauthorised alterations.
- Stains, excessive dirt, or smells.
If you notice any changes during the inspection, take clear, dated photographs to support your findings. Visual evidence is particularly useful when justifying deductions from the tenant’s deposit.
It is best practice to invite the tenant to take part in the inventory check with you. This gives them the opportunity to discuss any issues, avoid surprises, and ensure you’re acting with complete transparency.
It’s very important to note that not all changes are the tenant’s responsibility, as landlords have to expect some wear and tear to occur naturally over time. More on this next!
Understanding fair wear and tear
During the inventory check, it is unlikely that everything will appear exactly as it did at the start of the tenancy, particularly if the tenant has lived there for several years. Landlords must expect some deterioration in fixtures and fittings over time – this is known as fair wear and tear.
Of course, what one person considers fair wear and tear may differ from that of the next person, making this one of the most subjective and contentious areas of property management.
The House of Lords defines fair wear and tear as the unavoidable deterioration caused by the ‘reasonable use of the premises by the tenant and the ordinary operation of natural forces.’
When deciding whether damage should be classified as fair wear and tear, landlords should consider the following:
- How did the damage occur?
- What was the condition at the start of the tenancy?
- How long has the tenant occupied the property?
- How many occupants live at the property?
Need further clarification? We’ve written a whole blog on the subject: Understanding Fair Wear and Tear for Rental Properties.
Documenting your inventory check
Thoroughly document your final property inspection and inventory check to collect evidence of the property’s condition at the end of the tenancy. Take clear, dated photographs of each room after cleaning, as well as close-up photographs of any damage or wear and tear. Take note of any areas where cleaning was not up to scratch, and keep receipts for any professional cleaning services you have used. Thorough documentation at this stage will provide valuable evidence later on if a dispute arises or if you need to deduct money from the tenant’s deposit.
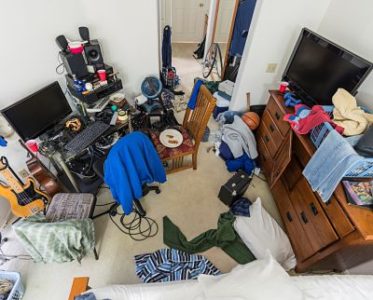
Step-by-step guide to end-of-tenancy cleaning
Whether you’re cleaning your rental property yourself or providing guidance to tenants, this checklist offers a step-by-step approach to end-of-tenancy cleaning.
When deep cleaning a rental property, work systematically around the house, room by room, to ensure that nothing is missed. Here’s a useful checklist covering key areas to clean and tasks to complete.
Kitchen
- Clean and disinfect the worktops and sink.
- Clean inside all cupboards and drawers.
- Clean the oven, hobs, and extractor fan.
- Empty and wipe out the fridge and freezer.
- Mop the floor.
- Wipe down wall tiles.
- Clean inside the microwave.
- Sanitise the bins.
Bathroom
- Deep clean the shower, bath, and tiles.
- Clean the basin and countertops.
- Clean the shower screen with glass cleaner.
- Scrub and disinfect the toilet.
- Clean inside any cupboards and drawers.
- Polish mirrors and taps.
- Mop the floor.
- Wipe down tiles.
Living areas, bedrooms, hallways, and stairs
- Dust all surfaces and remove cobwebs.
- Wipe down skirting boards and shelves.
- Hoover carpets or mop hard floors.
- Hoover under and behind furniture.
- Wipe down inside wardrobes and storage cupboards.
- Dust light fittings and lampshades.
Making an end-of-tenancy deposit deduction
End-of-tenancy deposit deductions are a frequent source of friction between tenants and landlords. The easiest way to avoid disputes is to set clear expectations from the start and communicate how the end-of-tenancy process works well in advance. If tenants understand what is expected of them and how their deposit will be handled, they’re more likely to leave the property in good condition and accept any reasonable deductions.
Valid reasons for making a deposit deduction
If the end-of-tenancy inspection and inventory check reveal some unexpected surprises, then the landlord may be within their rights to deduct money from the tenant’s deposit to cover the expense incurred. There are strict regulations surrounding what landlords can and cannot make deductions for, so make sure you fully understand these and have the required evidence before charging your tenant.
Common reasons that landlords deduct money from a tenant’s deposit include:
- Damage to the property that is beyond fair wear and tear.
- Items from the inventory are missing.
- Property has not been restored to its original standard of cleanliness.
- Repairs are required due to tenant negligence or unauthorised alterations.
Evidence required to make a deposit deduction
If you want to deduct money from your tenant’s deposit to cover the cost of cleaning or repairs, then you must have the required proof.
Typically, deposit protection schemes will require you to have the following evidence:
- Signed check-in and check-out inventories.
- Photos of damage, cleanliness issues, or missing items.
- Receipts or invoices for cleaning, repairs, or replacements.
- Any relevant correspondence with the tenant.
How to claim a deduction from the tenant’s deposit
Once you’ve gathered your evidence, calculate the cost of rectifying the problems you’ve identified. Then, contact the tenant to explain why you are making the deduction and how much it will cost, providing supporting evidence. If the tenant agrees or fails to respond, submit your claim to the tenancy deposit scheme where the tenant’s deposit is registered. If the tenant disputes the deduction, then it will need to be handled by the deposit protection scheme’s free alternative dispute resolution (ADR) service.
Tips for preventing end-of-tenancy issues
The majority of end-of-tenancy issues can be avoided if you have a strong system in place and communicate clearly with your tenant throughout the tenancy. We’ve compiled some practical tips to help you avoid problems when it’s time for your tenant to move out.
- Create a detailed move-in inventory.
- Give tenants an overview of the end-of-tenancy process during onboarding.
- Set clear expectations from the start.
- Maintain open communication throughout the tenancy.
- Encourage tenants to report issues promptly and respond to maintenance requests in a timely manner.
- Carry out regular property inspections (every 3 to 6 months).
- Create an end-of-tenancy guide to share with tenants when they give notice.
- Create an end-of-tenancy cleaning checklist to share with tenants.
- Ask tenants to join you when you carry out the end-of-tenancy property inspection and inventory check.
- Keep thorough records, both written and photographic, where appropriate.
Follow the advice in this article to make the transition from one tenancy to the next as smooth as possible. Make it clear to tenants from the start what their responsibilities are for maintaining the property and returning it to you in the same condition it was in when they moved in. Develop a comprehensive and well-structured end-of-tenancy process that encompasses inspections, cleaning, maintenance, and repairs. Taking a professional and proactive approach when a tenancy comes to an end will reduce the risk of disputes and help you get your property back on the market as quickly as possible.